Retrochallenge 2016/01 Wrap-up

IMG_1076Well, we’re at the end of another retrochallenge. I knew that time would be limited for me this time, but I still managed to have a little bit of fun. Unfortunately, there was a severe lack of blogging updates, and I missed my target. But it’s all about having fun, right?

What was I able to accomplish? I was able to boot up an old VAX machine from my collection. CANADA:: was using a license from the VMS Hobbyist program that had expired several years ago. Trying to track down the current hobbyist registration page was difficult, and a big roadblock was thrown up by requiring a DECUS membership number – the drop-down list of DECUS chapters no longer includes the defunct DECUS Canada so my membership number wasn’t accepted by the form.

I was forced to use a little utility called PAKGEN which is able to generate VMS license keys on demand. I’m not advocating piracy, and I will continue to try to get my hobbyist license renewed.

What about the radio part of the project? I was able to get CANADA:: to talk to my DECnet network at home over a rather short radio link. During this testing, I was able to confirm that the Icom ID-1 radios truly are an ethernet bridge, and they will pass any ethernet traffic sent to them – even protocols as weird as DECnet, which accomplishes layer 3 addressing by altering the layer 2 MAC address.

I also confirmed that DECnet performance is terrible over unreliable links! DECnet (probably rightly) assumes that an Ethernet link is reliable, and any dropped packets take the performance down to a crawl while it tries to recover. The ID1 bridge delivers a 128Kbps half duplex ethernet bridge. There is no error detection/correction in this bridge. The ID1 assumes that there’s a higher layer that will take care of this – which is perfectly acceptable for TCP.

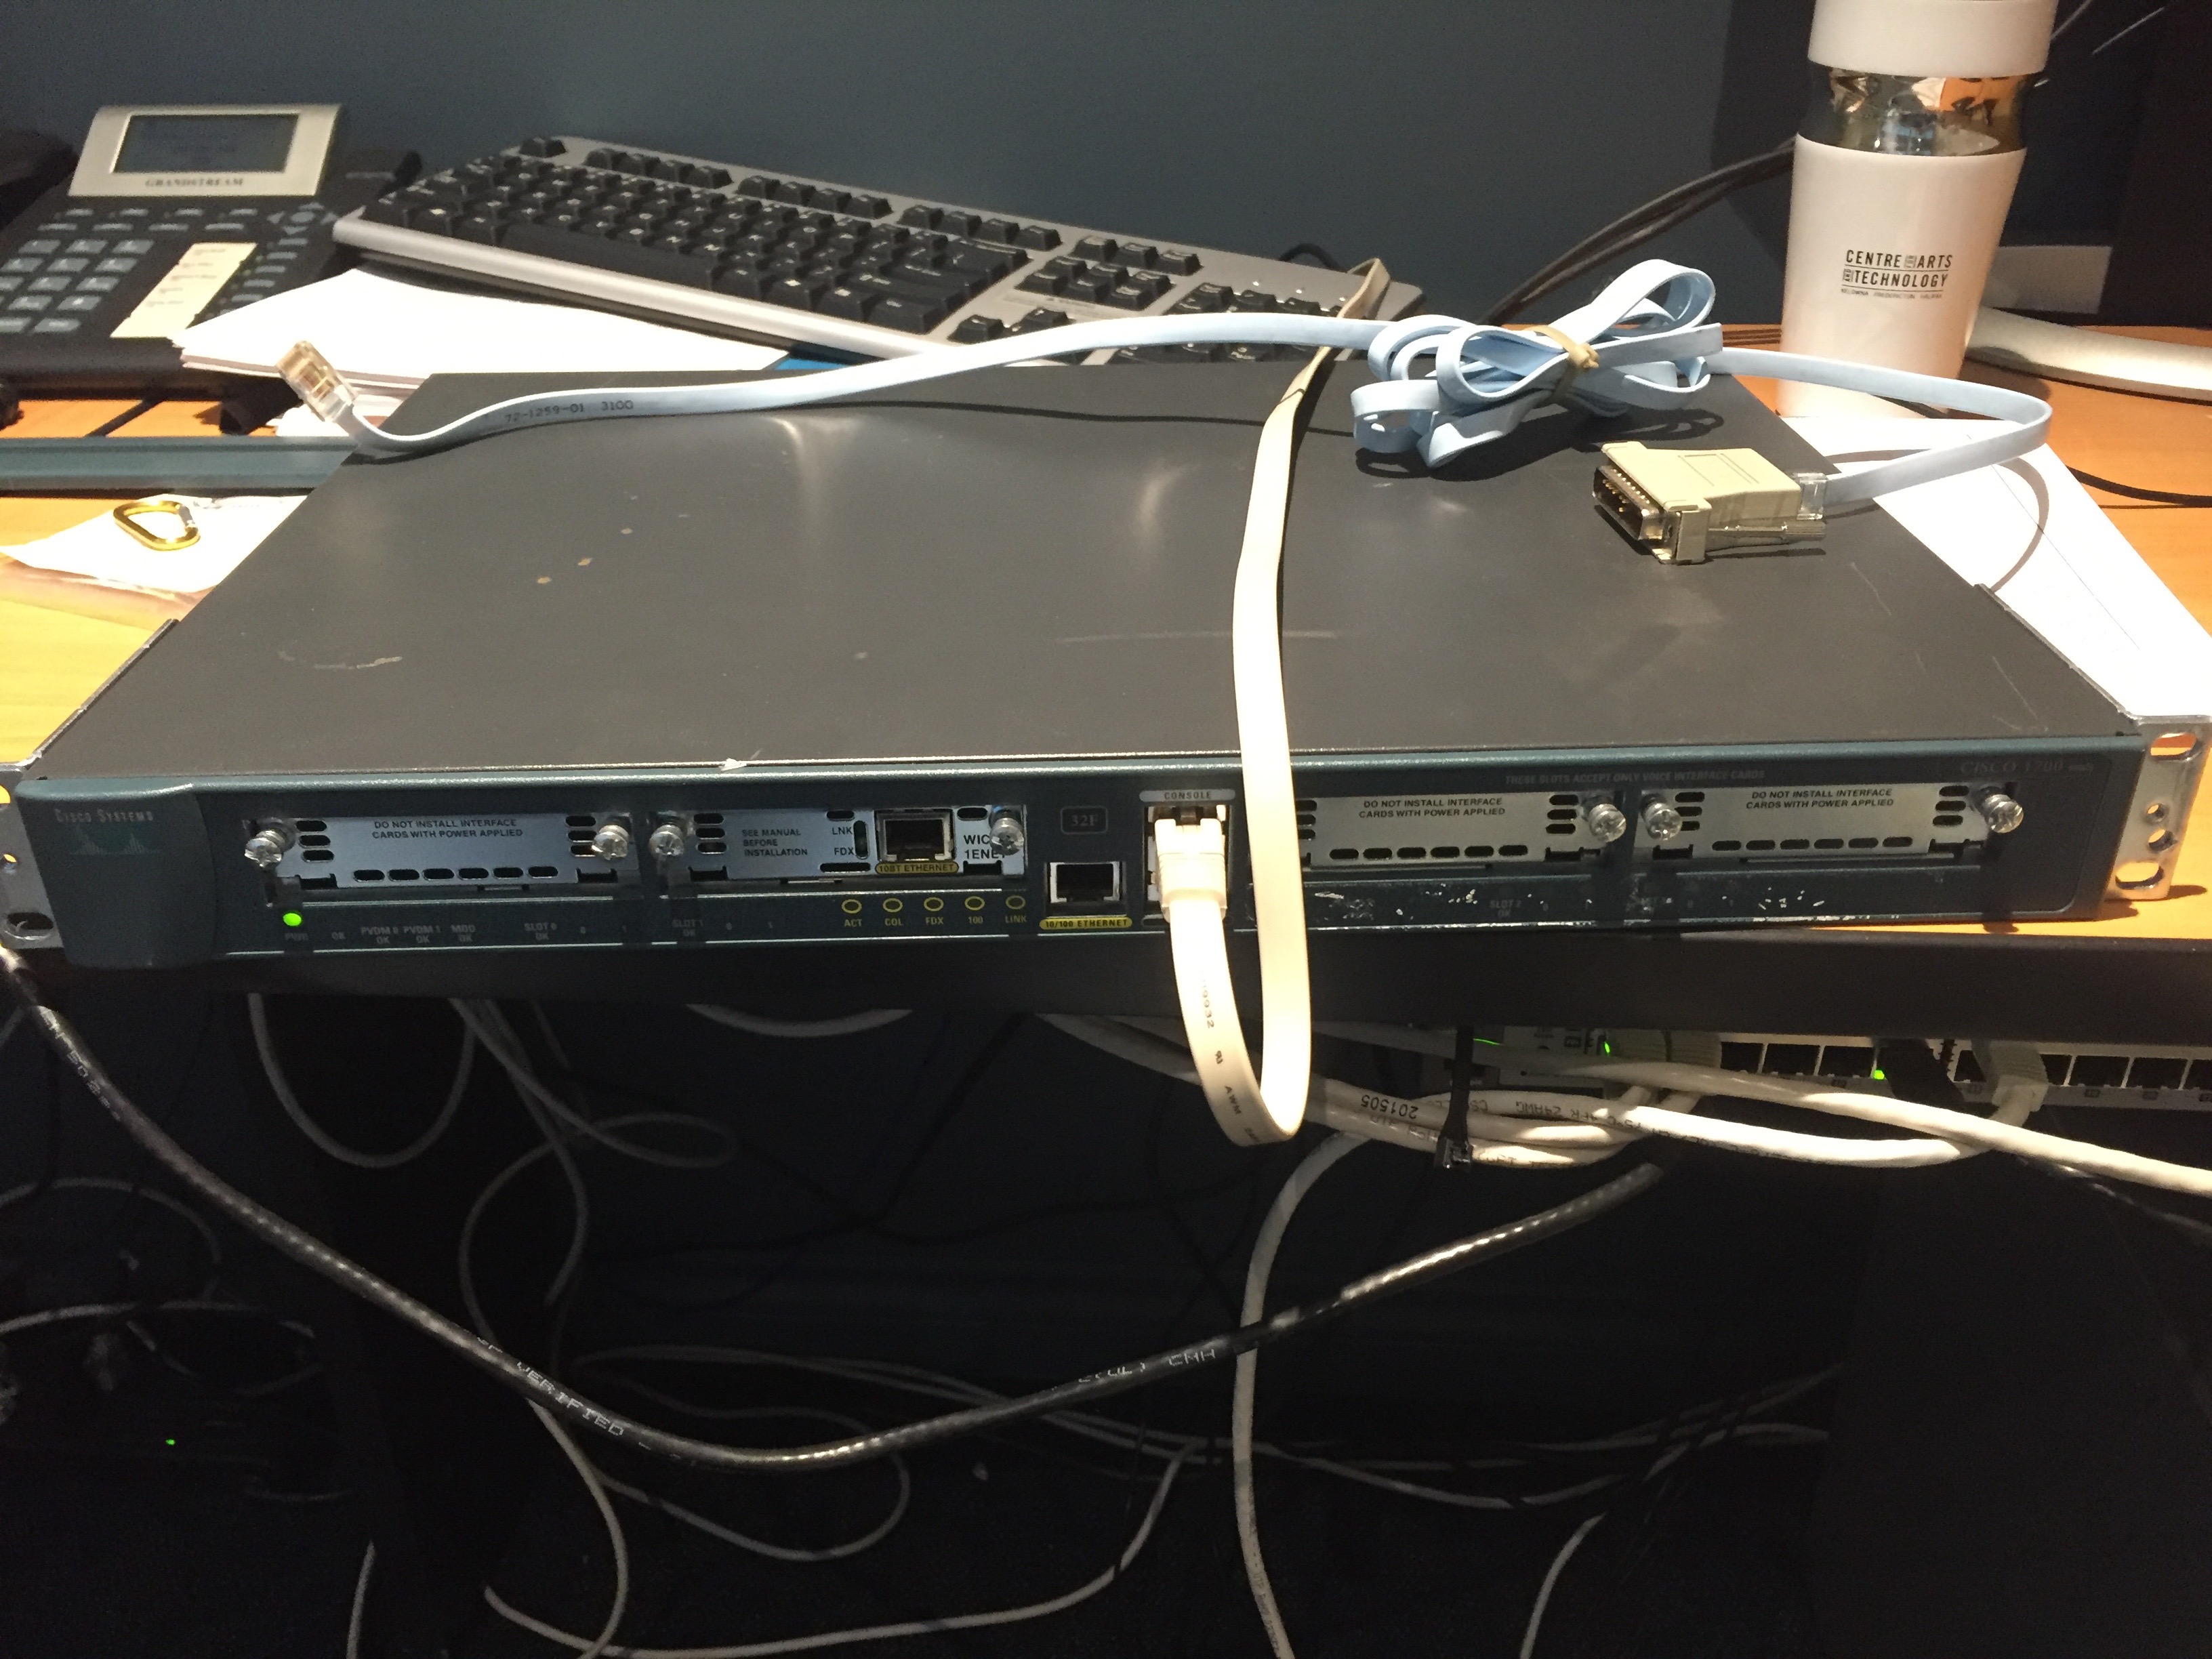
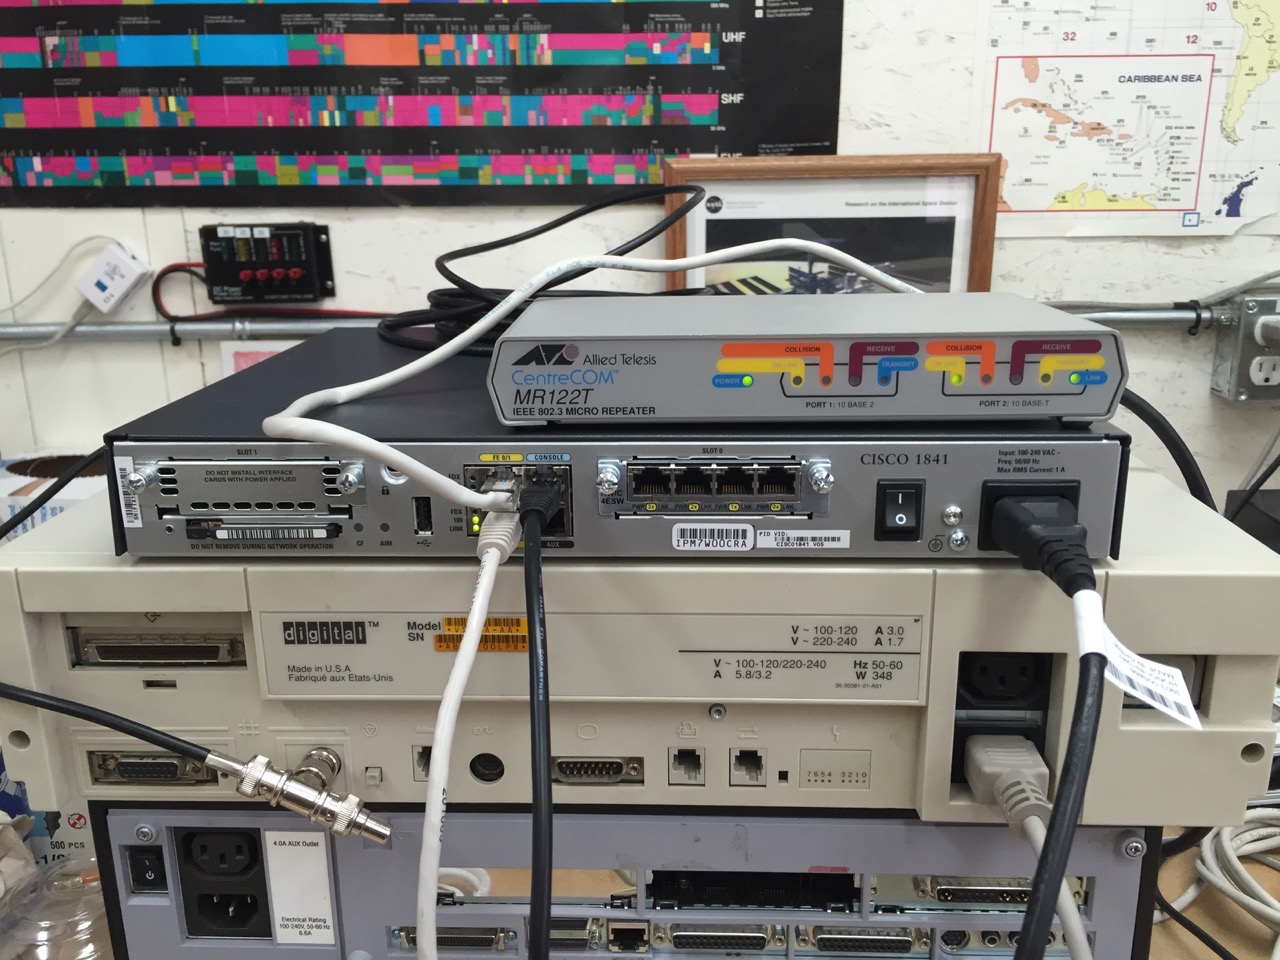
I also spent some quality time with antique Cisco routers. I happily discovered that the Cisco 1841 has a build of IOS that supports DECnet. The intent of my challenge was to host this router at the local VA7DIG D-Star repeater site and have it route any DECnet traffic it heard over the air into the HECnet network. This is where I ran out of time, and haven’t got finished yet. I still intend to get this going, so I’ll provide more updates.

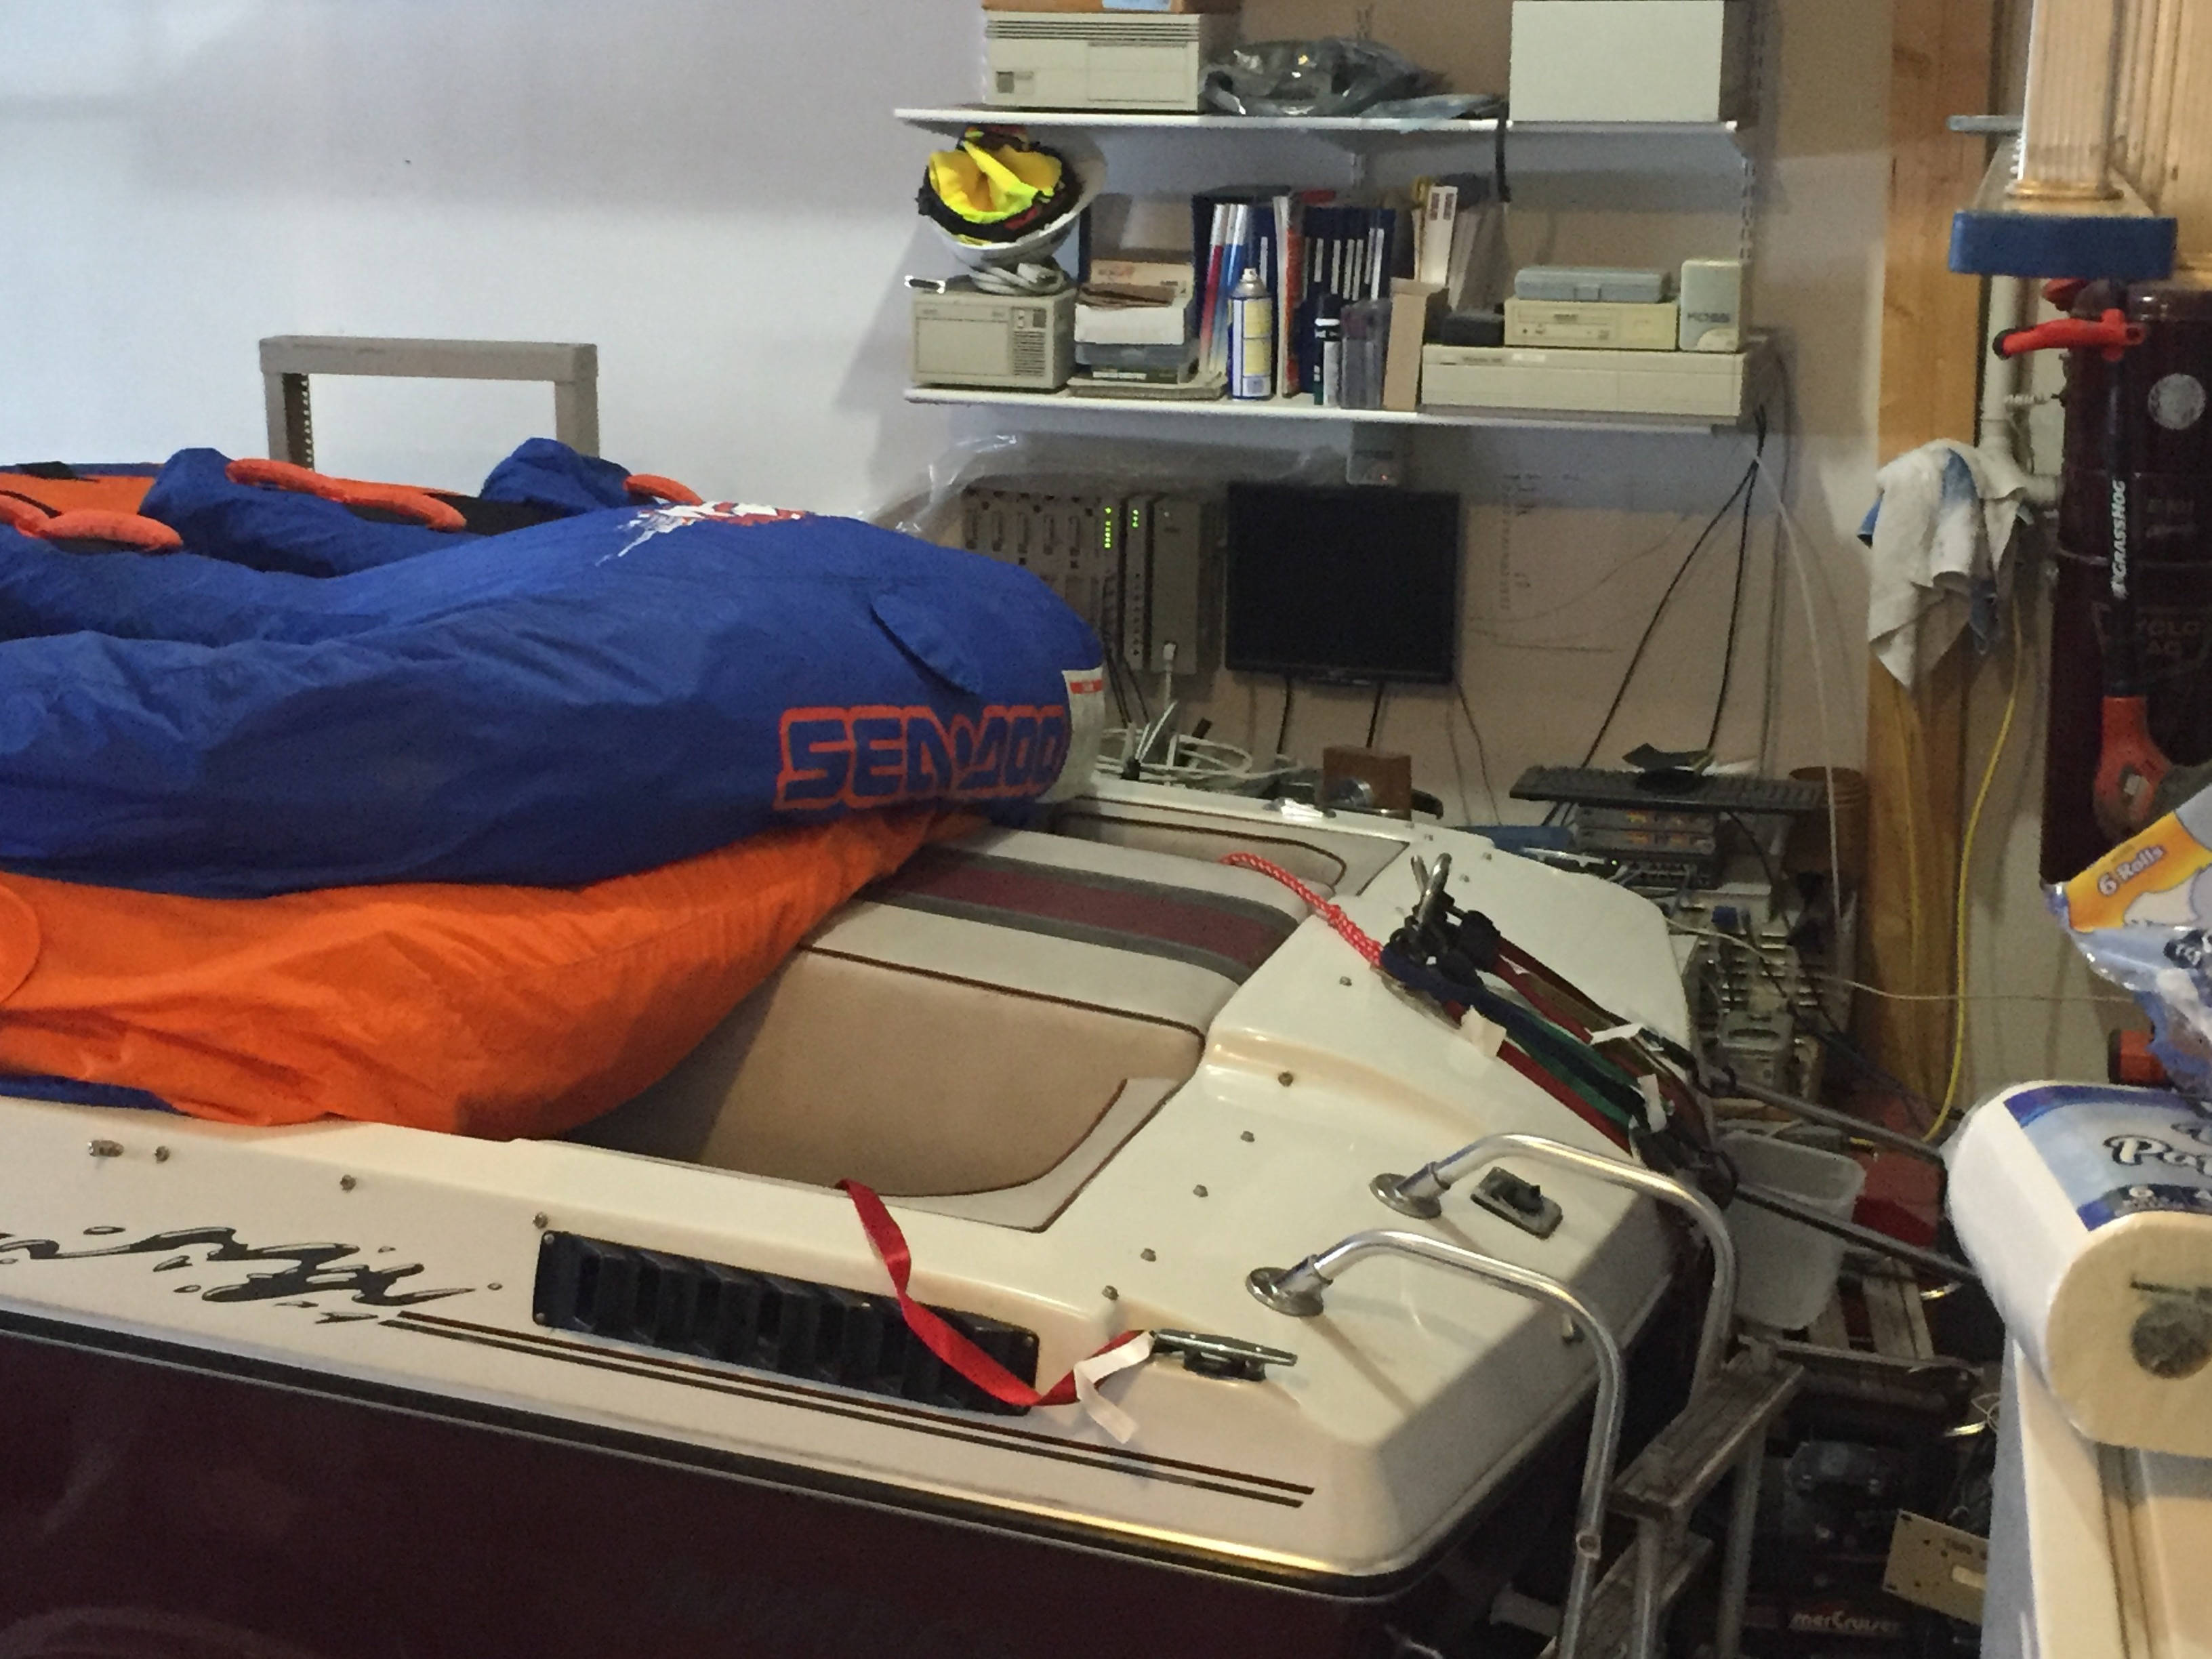
Of course there were lots of shiny bikes along the way. I got distracted by a couple of other projects. A nice little VFD display showed up from eBay, so of course I had to play with it.

Also, while digging around my office, I came across some old external hard drives. On one of them, I discovered an old Compukit UK101 emulator I wrote for windows 15 years ago! I thought I should dust off some old brain cells, and so I’ve decided to take a stab at learning Swift and porting the emulator over to OSX. This is a major work-in-progress, but hopefully there’s a useful skill at the end of it.

In summary, some success, but a lot of fail. We had a bumper crop of Retrochallenge entries this time around. I look forward to seeing the winners!

Retrochallenge 2016/01Begins

It’s 2016, and the start of a brand new Retrochallenge. Due to some big changes happening at work (I’ll post about that later), I haven’t had much time to prepare for the challenge this time around. I came up with a plan to combine some retro computing with some ham radio, knowing that I had all of the bits and pieces around, and I didn’t think it would be too big of a time commitment.

IMG_1045So, naturally, I procrastinated until January 1st before actually trying to gather all of the pieces I’ll need. Just a quick trip to the garage to get my VAX pieces… oh dear. I forgot that I have my brother-in-law’s boat in storage in our garage for the winter.

A 5-minute job turned into a major project to get the boat out of the way and try to dig out the pieces I’ll need. Initially, I wanted to try to get a MOP boot and remote operating system install happen over a RF bridge.

CXrHyrKUkAAvgXhOne very major problem has popped up. A key component to remote booting is my Infoserver 100. This is basically a net-mounted CD-ROM drive that allows a machine on the same network to boot off of a CD-ROM. The CD-ROM drive in this machine uses a very unique CD caddy that is different from the more common caddy of the era. Even after removing the boat, I was unable to locate my one and only caddy for this machine, so I’m not able to use the Infoserver, unless the caddy shows up before the end of the month.

I’m not going to let this small problem derail my challenge. So the network boot component might be out, but I’m still going to get a machine on HECnet via a ham radio digital link.

IMG_1046The first step is to take my target machine CANADA:: and get it connected via a ‘normal’ ethernet link. There are several ways to connect to HECnet, and my chosen method is to use a Cisco router. Some rummaging around at work and I’m able to locate a few older Cisco routers of various specifications. The next task is to find the correct hardware/firmware combination that will support DECnet routing.

Retrochallenge 2016/01 – DECnet over Radio

It’s that time of year. Another Retrochallenge is weeks away, and I’m completely not prepared.

The project I’m going to attempt is taking my two hobbies – Retrocomputing and ham radio – and combining them. Icom makes a ham radio that allows you to construct a point-to-point ethernet bridge at 128 kbps at 1.2 GHz – the Icom ID-1. This is mainly used for providing (slow) Internet services to the middle of nowhere, but my reading of the specifications show that this is a true ethernet bridge. If so, it should be able to bridge more than IP traffic, such as, for example, DECnet.

I intend to attempt to set up a point-to-point wireless ethernet link using 2 ID-1 radios. At one end of the link I will have a DEC InfoServer 100. The InfoServer is a magic DEC box that contains a CD ROM drive and allows for the remote installation of software using a protocol called MOP.

The other end of the link will have one of my many VAX machines with a blank drive. I will then remotely install the operating system. Once I have the operating system running, I will attach this machine to HECnet via the ethernet bridge.

Even though 128kbps is slow by today’s standards, it’s still quicker than many of the leased lines used in the original DECnet networks.

This should be enough work to keep me out of trouble, but still be achievable. Here goes!

Colourflow Revisited

colourflowIt’s finished. I accomplished what I set out to do, which was to take the code that I had submitted to Page 6 Magazine so many years ago, and answer the challenges that I had posed back then.

Now, Colourflow is frequency-independent (works with PAL and NTSC), and actually runs as a display list interrupt, so normal code (such as a BASIC program) can run and do things such as scan for keypresses, etc.

I even had some time to throw in a couple of additional features. The BASIC wrapper will scan for keypresses, and POKE values into the machine code to adjust the scrolling speed, or even change direction of the scrolling. The keys recognized are:

1-5 Change the scroll speed
U Scroll upwards
D Scroll downwards
Q Quit to BASIC

The speed change is done by changing a delay variable. The direction change is rather sneakily done by POKEing a DEX or INX command into memory to change the direction of the loop – BASIC modifying machine code on the fly!

This was a fairly basic Retrochallenge, but I had fun revisiting something that I had done when I was a third of my current age. It was fun to program within the limitations of the original hardware, although admittedly I did use emulation for times when I wasn’t near the hardware (such as at work).

IMG_0695If you’d like to look at the code, an ATR image is available – just open up in your favourite emulator. Or, if you’re adventurous, why not pull out your Atari hardware and run it from a real floppy disk.

My original submission to Page 6 Magazine was on cassette, so with tongue firmly in cheek, I thought I’d mock up a submission letter to the magazine with my new code.

Sadly, Page 6 Magazine stopped publication in 1998 after 85 issues. However, the retro computing hobby is very much alive, with what must be a record number of entrants into the Retrochallenge. I’ve had immense pleasure reading and following all of the entries.

Retrochallenge Mid-month Update

It’s the middle of the month, so time for a Retrochallenge update. I’ll admit that I got a bit distracted by the arrival of a beautiful Jupiter Ace replica kit, so I’ve spent a bit of time assembling it, but I’ve still managed to put in some time with my main Retrochallenge goal.

The biggest surprise was how rusty my 6502 is. I thought it would be like riding a bike, but it’s been a little rough. But some perseverance, and it’s starting to come back.

The original Colourflow doesn’t use any interrupts, but rather just locks up the processor in a tight timing loop. This means that nothing else can function – for example scanning for keypresses, etc. It’s a quirk of execution timing that makes the nice slow scrolling pattern. Because PAL and NTSC timing is different, the pattern doesn’t work on NTSC.

In order to get NTSC working, as well as have cycles to monitor key presses, etc, I’m going to have to go with an interrupt-driven routine. After using De Re Atari to brush up on my video interrupt options, I’ve decided to go with a display list interrupt (DLI) that will fire once per screen. The intention is to increment my starting colour once every few screens, which will give me the effect of scrolling the display.

So far, I’ve got a nice static display, just to test out the interrupts, and here’s the result:

colourflow-test1Here’s the code used to create it:

colourflow-test1-list

This code is called TEST1.ASM on the disk image, if you’d like to try it yourself. The interrupt vector will eventually get loaded via BASIC, but for now, here’s how you can set the vector while you’re in the Assembler Editor.

ENTER#D1:TEST.ASM
ASM
BUG
D0230,0231     ; Get address of the display list. 0x9C20 in our case
C9C28<82       ; Set DLI bit on one of the display list instructions
C0200<00,06    ; Set DLI routine address to 0x0600
CD40E<C0       ; Enable DLI

There we go. We’re half way through the month, and I’m about half way done.

Explaining the Bug

After (re)discovering the semicolon bug in Atari BASIC revision A, I thought I’d spend a bit of time trying to find out exactly why BASIC was exhibiting this behaviour. In order to do this, I had to re-learn how BASIC stores programs in memory.

Atari BASIC uses tokenization to reduce the memory footprint and increase the execution speed of programs. Tokenization replaces keyword strings (such as PRINT) with single-character tokens (0x20). Ultimately, this bug is caused by the tokenization process and incorrect bounds checking.

First, let’s look at a simple PRINT statement, and how Atari BASIC tokenizes it. You may want to reference De Re Atari which has a good explanation of the tokenizing process, as well as a token table.

print-hi

0A 00 0A 0A 20 0F 02 48 49 16
line number llen slen PRINT string strlen H I eol

Our first example print statement has a 2-byte string constant “HI”, followed by the token for end-of-line. 0x20 is the token for PRINT. llen and slen are the line length and statement length.
print-hi-semicolon

0A 00 0B 0B 20 0F 02 48 49 15 16
line number llen slen PRINT string strlen H I ; eol

Our second example adds a semicolon to the end of line. The normal behaviour for semicolon is to suppress the automatic carriage return. Note that the string is still 2 bytes long, followed by the token for the semicolon (0x15).

print-hi-control-u

0A 00 0B 0B 20 0F 03 48 49 15 16
line number llen slen PRINT string strlen H I ^U eol

Our third example now has a 3-byte string constant with no semicolon. The only difference between this example and the previous example is the string constant length.

Now that we’ve seen how the different lines are tokenized, let’s look at the BASIC source code. We need to look at the XPRINT function, which begins at 0xB3B6.

B3B6            XPRINT
B3B6  A5C9          LDA     PTABW           ; GET TAB VALUE
B3B8  85AF          STA     SCANT           ; SCANT
B3BA  A900          LDA     #0              ; SET OUT INDEX = 0
B3BC  8594          STA     COX
                ;
B3BE  A4A8      :XPR0   LDY    STINDEX      ; GET STMT DISPL
B3C0  B18A          LDA     [STMCUR],Y      ; GET TOKEN
                ;
B3C2  C912          CMP     #CCOM
B3C4  F053 ^B419    BEQ     :XPTAB          ; BR IF TAB
B3C6  C916          CMP     #CCR
B3C8  F07C ^B446    BEQ     :XPEOL          ; BR IF EOL
B3CA  C914          CMP     #CEOS
B3CC  F078 ^B446    BEQ     :XPEOL          ; BR IF EOL
B3CE  C915          CMP     #CSC
B3D0  F06F ^B441    BEQ     :XPNULL         ; BR IF NULL
B3D2  C91C          CMP     #CPND
B3D4  F061 ^B437    BEQ     :XPRIOD
                ;
B3D6  20E0AA        JSR     EXEXPR          ; GO EVALUATE EXPRESSION
B3D9  20F2AB        JSR     ARGPOP          ; POP FINAL VALUE
B3DC  C6A8          DEC     STINDEX         ; DEC STINDEX
B3DE  24D2          BIT     VTYPE           ; IS THIS A STRING
B3E0  3016 ^B3F8    BMI     :XPSTR          ; BR IF STRING
                ;
B3E2  20E6D8        JSR     CVFASC          ; CONVERT TO ASCII
B3E5  A900          LDA     #0
B3E7  85F2          STA     CIX
                ;
B3E9  A4F2      :XPR1   LDX     CIX         ; OUTPUT ASCII CHARACTERS
B3EB  B1F3          LDA     [INBUFF],Y      ; FROM INBUFF
B3ED  48            PHA                     ; UNTIL THE CHAR
B3EE  E6F2          INC     CIX             ; WITH THE MSB ON
B3F0  205DB4        JSR     :XPRC           ; IS FOUND
B3F3  68            PLA
B3F4  10F3 ^B3E9    BPL     :XPR1
B3F6  30C6 ^B3BE    BMI     :XPR0           ; THEN GO FOR NEXT TOKEN
B3F8            :XPSTR
B3F8  209BAB        JSR     GSTRAD          ; GO GET ABS STRING ARRAY
B3FB  A900          LDA     #0
B3FD  85F2          STA     CIX
B3FF  A5D6      :XPR2C  LDA     VTYPE+EVSLEN    ; IF LEN LOW
B401  D004 ^B407    BNE     :XPR2B          ; NOT ZERO BR
B403  C6D7          DEC     VTYPE+EVSLEN+1  ; DEC LEN HI
B405  30B7 ^B3BE    BMI     :XPR0           ; BR IF DONE
B407  C6D6      :XPR2B  DEC     VTYPE+EVSLEN    ; DEC LEN LOW
                ;
B409  A4F2      :XPR2   LDY     CIX         ; OUTPUT STRING CHARS
B40B  B1D4          LDA     [VTYPE+EVSADR],Y ; FOR THE LENGTH
B40D  E6F2          INC     CIX             ; OF THE STRING
B40F  D002 ^B413    BNE     :XPR2A
B411  E6D5          INC     VTYPE+EVSADR+1
B413            :XPR2A
B413  205FB4        JSR     :XPRC1
B416  4CFFB3        JMP     :XPR2C
                ;
B419            :XPTAB
B419  A494      :XPR3   LDY     COX         ; DO UNTIL COX+1 <SCANT
B41B  C8            INY
B41C  C4AF          CPY     SCANT
B41E  9009 ^B429    BCC     :XPR4
B420  18        :XPIC3  CLC
B421  A5C9          LDA     PTABW           ; SCANT = SCANT+TAB
B423  65AF          ADC     SCANT
B425  85AF          STA     SCANT
B427  90F0 ^B419    BCC     :XPR3
                ;
B429  A494      :XPR4   LDY     COX         ; DO UNTIL COX = SCANT
B42B  C4AF          CPY     SCANT
B42D  B012 ^B441    BCS     :XPR4A
B42F  A920          LDA     #$20            ; PRINT BLANKS
B431  205DB4        JSR     :XPRC
B434  4C29B4        JMP     :XPR4
                ;
B437  2002BD    :XPRIOD JSR     GIOPRM      ; GET DEVICE NO.
B43A  85B5          STA     LISTDTD         ; SET AS LIT DEVICE
B43C  C6A8          DEC     STINDEX         ;DEC INDEX
B43E  4CBEB3        JMP     :XPR0           ; GET NEXT TOKEN
                ;
B441            :XPR4A
B441  E6A8      :XPNULL INC     STINDEX     ; INC STINDEX
B443  4CBEB3        JMP     :XPR0
                ;
B446            :XPEOL
B446  A4A8      :XPEOS  LDY     STINDEX     ; AT END OF PRINT
B448  88            DEY
B449  B18A          LDA     [STMCUR],Y      ; IF PREV CHAR WAS
B44B  C915          CMP     #CSC            ; SEMI COLON THEN DONE
B44D  F009 ^B458    BEQ     :XPRTN          ; ELSE PRINT A CR
B44F  C912          CMP     #CCOM           ; OR A COMMA
B451  F005 ^B458    BEQ     :XPRTN          ; THEN DONE
B453  A99B          LDA     #CR
B445  205FB4        JSR     :XPRC1          ; THEN DONE
B458            :XPRTN
B458  A900          LDA     #0              ; SET PRIMARY
B45A  85B5          STA     LISTDTD         ; LIST DVC = 0
B45C  60            RTS                     ; AND RETURN

I know that’s a lot of code, but let’s follow the bouncing ball. The first key part happens at address 0xB3C8 – we look for an eol token (0x16). If we find one, we branch to XPEOL (0xB446). What’s the first thing we do at the end of line? We rewind one byte (DEY – decrement Y), and see if it’s the token for semicolon (0x15). If it is, we skip printing a carriage return.

But wait a minute. We blindly rewind one byte, even if that rewind takes us inside a string constant! There’s the bug. We should not be blindly rewinding one byte – we should be checking to see if we are inside a string constant our outside a string constant.

Looking at the code, similar behaviour will happen with the value 0x12, which is the token for a comma.

This bug has been fixed in revision C BASIC, but I’m not aware of commented source code being available for revision C.

Rediscovering a Bug in Atari BASIC

In order answer my challenge from 32 years ago, I need to get the original Colourflow code into an Atari. My original cassette tapes are long-gone, so all that’s left is the code listing as printed in Page 6 magazine. It’s only 34 lines of BASIC, but there’s a bit of a problem. The code displays the Atari fuji logo created with character graphics, but it’s difficult to figure out the individual characters from the listing.

Never mind. I’ll use the same technique that 15-year-old me used all those years ago – I’ll steal it. I ‘borrowed’ the fuji logo from the cassette loader portion of Atari’s SCRAM program (a fun little nuclear power plant disaster simulator).

I’m trying to address this challenge with minimal use of emulators, but I don’t have a working 410 cassette player (belt rot), so I used Atari800MacX to grab the loader from the cassette and transfer it to a floppy. Some quick edits, and typing in the rest of the code, and I’ve re-created my original BASIC program. Here’s an ATR image of a disk with the BASIC code as well as the SCRAM loader, if you’d like to play along at home.

Running the code an an NTSC machine doesn’t give me the proper display because of the difference in PAL and NTSC timing. However, if I boot up Atari800MacX with the PAL ROMs and set it to PAL timing, I actually get the original Colourflow display! So, by the end of the month, I need to re-create this in a region-independent version, along with keyboard interrupt, and who-knows-what-else functionality.

scramBut what’s this BASIC bug I mentioned? Well, if you look at the screenshot of the SCRAM loader that’s posted on AtariMania, you’ll notice that there’s a blank line running through the middle of the fuji logo. What’s that all about? If I run SCRAM on my 800 I don’t see this. But on a 130XE the gap is there. Looking at the SCRAM loader source code, it looks obvious – check out line 50. What’s that extra PRINT at the end?

extraprint

It turns out that if you remove this PRINT statement, the code works correctly on a 130XE, but breaks on an 800 – the output of line 50 and 55 get concatenated just like if there was a semicolon at the end of line 50.

After playing around a bit, I was able to determine that the problem was related to the revision A BASIC cartridge. If I placed a revision A BASIC cartridge in my 130XE, the problem followed. The 130XE contains revision C BASIC. I don’t have revision B convenient (without using an emulator) so I can’t determine if the problem occurs in revision B.

The problem is caused by the character at the end of line 50. This is character 0x15 or CHR$(21). It turns out that any PRINT statement that ends in this character will act as if there is a semicolon at the end of the line (i.e. surprise the carriage return). Atari was obviously aware of the problem, because they coded the SCRAM loader with the extra PRINT statement to force the carriage return.

Before I dig in to the cause of this, was Atari’s workaround the best way to do this? Obviously not, because they broke forward compatibility in later versions of BASIC. In hindsight, perhaps putting an extra space at the end of the PRINT statement would fix the problem without breaking once the bug was patched. Maybe Atari didn’t expect the bug to be patched?

Is this a known BASIC bug? I looked for an official bug list, but couldn’t find one. There are a few famous Atari BASIC bugs, some of which were listed in the July 1986 issue of Compute! magazine.

Looking at the source code for Atari BASIC, I’ve found the cause of the bug, and in a later posting, I’ll outline what I’ve discovered. If you can’t wait, the big clue is in the ASCII value for the suspect character, and the BASIC token table.

Day 1 for RetroChallenge 2015/07 is over, and I’m having fun. Spending half an hour typing in source code from a magazine really took me back to the old days of software distribution (and also reinforced my memory of just how bad the 130XE keyboard was).


Revisiting Colourflow

Choosing a RetroChallenge project is a fine line between picking something exciting and challenging, while making sure that it’s possible to complete in 30 days. Having crashed and burned on the last Winter Warmup, I’m trying to pick something a bit more achievable this time around.

Assembler Editor CartridgeBack in 1983, when I was 15, I started dabbling in 6502 assembly language after acquiring Atari’s Assembler Editor cartridge. This cartridge, along with De Re Atari, was a powerful combination. One of the first things I made was a neat little colour effect that looked like coloured venetian blinds scrolling down the screen. The code was crude and relied on a tight timing loop that just happened to create the effect.

I bundled up my assembly into a BASIC loader that put the Atari fuji on the display (blatantly stolen from one of Atari’s loaders), and submitted the program to Page 6 magazine. Surprisingly, my program was accepted, and showed up in the September/October 1984 issue (issue 11). “Colourflow” was my one and only published article in print.
Page 6 Magazine Issue 11So, what’s this got to do with RetroChallenge? Well, after reading 15-year-old me, I noticed that I had thrown down a challenge in my article.

The machine is locked in an endless loop so the only way out is to press SYSTEM RESET. I tried to incorporate code which sensed a keypress but this destroyed the precise timing loop. Maybe other readers can come up with a solution?

Sounds like a challenge to me! My RC2015/07 RetroChallenge entry is to re-visit Colourflow and address my 32-year-old challenge. Actually, there’s a second problem that I need to address. I wrote the original program on a PAL Atari 400 in the UK. The timing is slightly different on NTSC, and the effect doesn’t work at all on an NTSC machine. So, not only do I have to address my original challenge, I need to make the code work on NTSC as well as PAL.

To make it interesting, I want to recreate my original coding environment as closely as possible. This was written on an Atari 400, with the Assembler Editor cartridge. My sole form of storage was a cassette recorder. I’m not going to be so medieval as use a tape recorder, but I will try to code this using real hardware and the Assembler Editor.

Let’s see if I can complete another RetroChallenge! This year’s challenge runs from July 1 to July 31, 2015.

Who Needs Level Shifting?

IMG_0138After struggling with various methods of level shifting to convert the TTL 5v logic of the keyboard to the 3.3v logic of the Teensy, I decided to take a step back and wonder exactly why I was struggling with level shifting. Did I really need to use a 3.3v device? Things were so much simpler when everything was 5v logic!

A quick investigation showed that there is an Arduino that is 5v logic and also supports HID – the Arduino Micro. After waiting a few days for my order to show up, I was away to the races with 5v logic. About an hour later, I had the keyboard interfaced to the Arduino Micro, and my logic probe showed that I could scan the matrix and detect key presses.

There’s 6 outputs to scan the keyboard matrix, and 2 inputs – one for Control, Shift, Break, and one for the rest of the keyboard.

Now that the hardware side is locked down, I now need to write a lookup table to convert the POKEY scancodes into HID key presses.

Nothing is ever that easy

IMG_0127I took on the project of a keyboard adapter for this RetroChallenge because I’m a bit pressed for time, and I though that this was simple enough that I could whip it together from stuff in my junk box.

First, I need a microcontroller that has HID built-in, to simplify the process of emulating a PC keyboard over USB.  Digging around in my collection, I found a few Teensy 3.0 Arduino clones that I got from a Kickstarter a few years ago.  These offer HID, and a quick test sketch proved it.

Ahh, but this micro controller is 3.3v only. The Atari XEGS keyboard has a couple of 4051 ICs inside, and operates off of 5v. More digging, and I find an Adafruit 8-channel logic level converter.

I’ll post my reverse engineering findings soon, but I’ve determined that I need 6 output lines to scan the keyboard, and two input lines to return the results (1 for control, shift, and break; and the second for the rest of the keys). This 8-port device should be fine.

However, after wiring it up, I wasn’t getting anything. Hooking up a logic analyzer showed that the outputs were all over the place. After some head-scratching, I determined that the fancy auto-direction-detect of this level converter was getting confused by the voltage levels and pull-ups/pulldowns that were in the keyboard.

Back to the drawing board. I don’t need anything with auto direction detection – each of my signals is unidirectional. Some 74AHCT125 ICs should give me the level shifting I need, but I don’t have any here. So my once-easy project is now waiting for parts to arrive.